
Roasting coffee beans at home is a very easy task. You can roast the coffee in your kitchen oven at home; this is one of the steps involved in preparing coffee. Roasting coffee beans at home is less expensive than buying roasted coffee from stores.
The temperature at which you roast your coffee will determine how perfect the coffee will be. Pay attention to the behavior and color changes of the coffee beans while you are roasting it. Also, get prepared to remove the coffee beans when it has gotten the temperature most suitable for the type of coffee you want.
Roasting Your Green Coffee Beans in Your Oven
1. Open a window and turn on your stove fan to vent the smoke
When you are roasting your coffee, there is some smoke produced during the process. If your stove has a vent fan, you can turn it on during the roasting process. For additional ventilation, you can open any of the windows near the oven.
If you have a smoke detector at home, turn it off during the process, then back on. The batteries of the smoke detector should not be removed but rather kept intact.
2. Preheat your oven to 250 degrees to begin the process
Before you put your coffee in the oven, you have to preheat the oven to a temperature of 250 degrees Celsius. Make sure you check the oven for the correct temperature.
- Each time you open the door of the oven, the temperature inside the oven drops. This means that the thermometer will be a better way of checking the temperature is steady
- You can remove any other rack inside the oven; only one of the racks is needed for the roasting process.
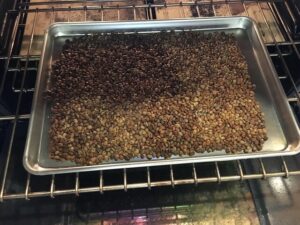
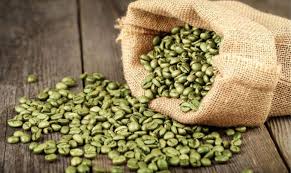
3. Place the green coffee beans into a perforated metal pan in a single layer
 If you want each of the coffee beans to receive the same amount of heating, then you need to make sure the coffee is evenly spaced and it’s better if not touching. Only place the coffee beans that will be enough to spread across the bottom of the pan.
- You can buy your green coffee beans at an online coffee store or at a local coffee roaster
- If the coffee you are roasting is much, then you need to roast your coffee in batches.
4. Place your green coffee beans on a perforated pan
Place the perforated pan with the coffee beans on a baking sheet and place it on the middle rack in your oven. Record the temperature of the oven when you put it in. Switch on the light of the oven, so you observe the coffee beans during the process.
You can close the oven’s door after you have switched on the light; you will have to open the oven’s door frequently during the roasting process.
5. Stir the coffee beans every 1 to 4 minutes
You can use a clock or timer to set the time; this will help you know when to stir the coffee. Each time you open the oven to stir the coffee, take note of the color of the beans and the temperature of the oven.
For the first few minutes of roasting, the coffee beans will change from a green color to yellow. The coffee beans will change to brown over time.
- Please pay attention to the sounds coming from the oven, especially when you have closed the door of the oven. Some sounds might not be loud because of the closed door.
6. Reduce the oven temperature to 220 degrees when the beans turn light brown
You need to watch the coffee beans carefully as it turns from yellow to light brown. Once you see that the coffee beans have started changing to brown, lower the temperature of the oven to 220 degrees Celsius.
Even after you have reduced the temperature of the oven, you still need to pay attention to the coffee beans.
- The way ovens operate is different from one another; the temperature of the controller might not be the same as the temperature inside the oven.
7. Watch and listen for the first crack of the coffee beans
There should be a crack sound from the coffee bean when its internal temperature is about 205 degrees. The sound coming from the coffee bean will be similar to the sound of popcorn. Record the amount of time the coffee has been in the oven and the temperature when it made the first crack. You can stir the coffee beans once again.
- The light roast coffee is one that is roasted to the first crack sound
- If you are the type that likes a medium roast or dark roast, you can leave the coffee beans in the oven for additional time.
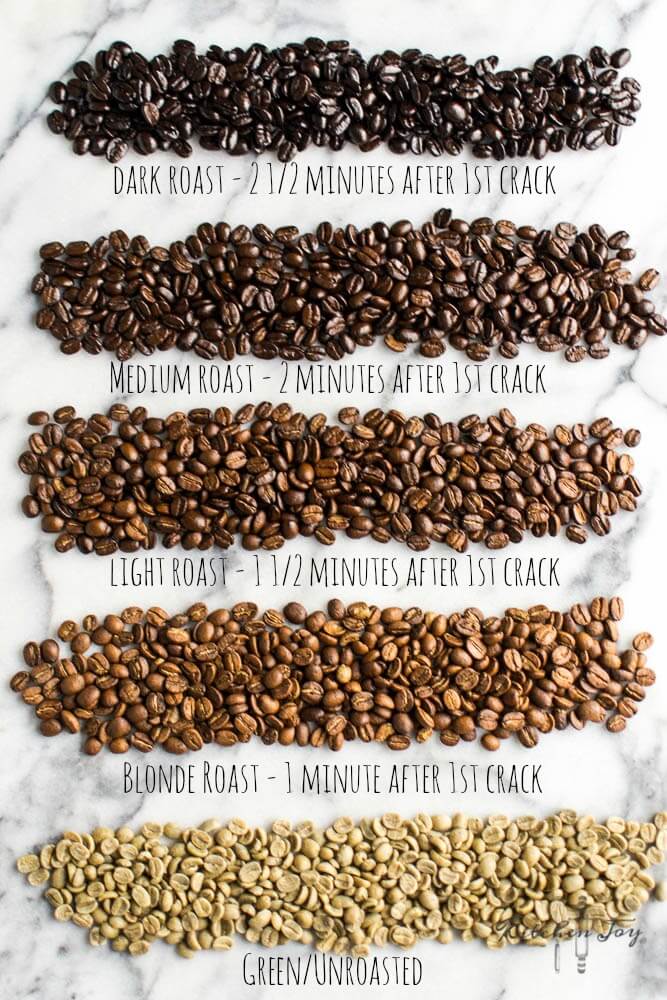
8. Stop roasting 1 to 2 minutes after the first crack for the medium-light roast
Once you hear the first crack from the coffee beans, you can set a timer for 2 minutes. The medium-light roast is coffee that is roasted up to 220 degrees. The medium-light roast should appear as light brown.
- Record the temperature of the oven when you took out the medium-light roast. This information can be used in the future
- The roast you make during your first roasting process might not be exactly what you want, but as time goes on, you will get it.
9. Continue roasting 2 minutes after the first crack for a darker roast
When your coffee beans stay longer than 2 minutes in the oven, they change from light brown to dark brown. This is the stage where the roast made can be used in the espresso. A second crack will also occur at this stage, but it won’t be as loud as the first one.
- You will have to work on the principle of timing until you know what each type of roast looks like.
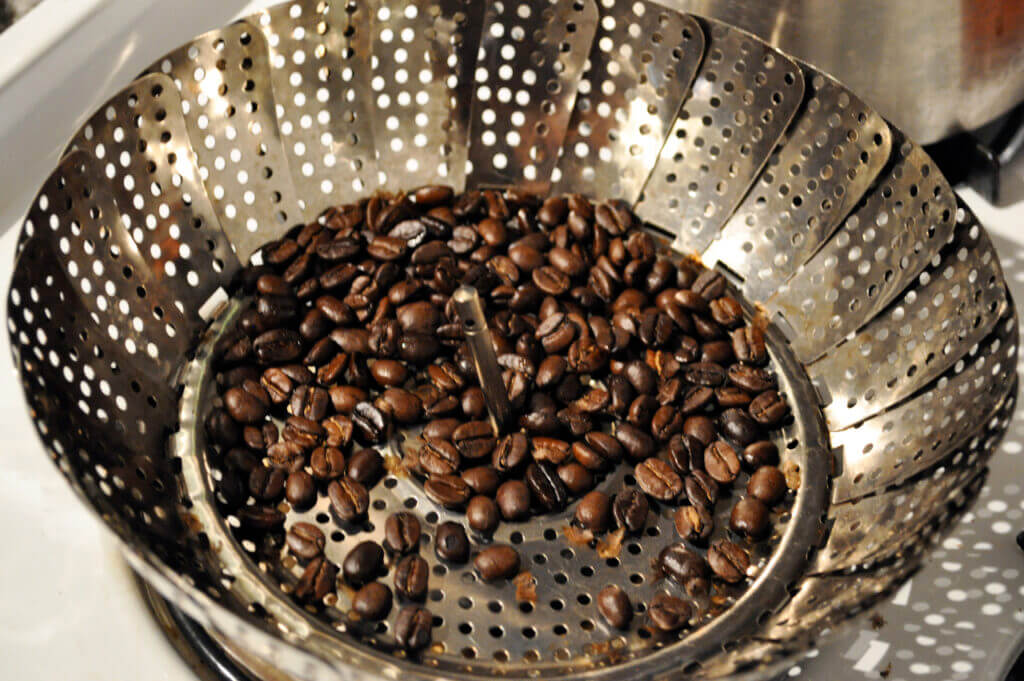
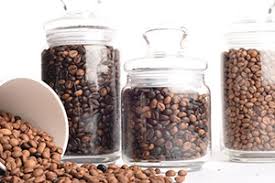
10. Pour the roasted beans into a strainer and cool for 2 hours
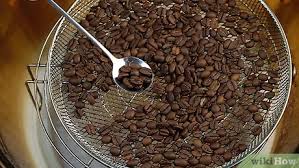
Once you are done roasting the coffee beans, bring them out from the oven and place them in a strainer. This will enable it to cool down; leave it in the strainer bowl for about 2 hours.
- You can shake the strainer; this will help you remove the chaff of the beans and allow it to cool faster.
11. Let the beans sit uncovered at room temperature for 2 days
After cooling the roasted coffee beans, the beans will still continue to emit carbon dioxide. This will last for 48 hours, so you can leave the coffee at room temperature to emit all the carbon dioxide in it.
Storing Roasted Coffee Beans
1. Use an airtight storage container for the roasted beans
You can use a Ziploc bag, glass, or plastic storage container to store the roast. The only thing you need to ensure is that the container is airtight. Don’t seal the coffee when it is emitting gases.
- You can buy an air tight storage container that allows for the emission of gases.
2. Store your roasted coffee beans at room temperature in a low humidity
Once you have sealed the coffee bag, you need to place it in a place with a stable temperature with low humidity. Coffee needs the same environmental condition as bread.
- If you are only storing your coffee for a short period, don’t put it in a fridge or freezer
- The only time you should store your coffee in a freezer is when you want to keep it for a longer period.
3. Choose a dark storage location or opaque container to protect the beans
Coffee does not need to be exposed to too much light or oxygen. So place your coffee in a dark room or cupboard. You can also place it in an opaque container.
4. Use the roasted coffee beans within 7 days for the best flavor
After the 7th day of roasting coffee, it starts to lose its taste, flavor and quality. So it is advisable to only roast the quantity of coffee you can finish in a week!
- If you keep the roasted coffee as explained above, the roasted coffee can last for weeks and months, but the flavor will dissipate slowly.
5. Freeze your roasted beans if you can’t use them immediately
If you are going to place your coffee in a freezer, make sure it is in an airtight container. When you remove your coffee from the freezer, let it defrost and come back to room temperature before you use it.
Finding the Perfect Green Coffee
1. Find a store or roaster where you can buy your green coffee
You can research coffee stores in your area to buy green coffee; you can also research online stores that can deliver them to you..
- These days, you have many options to get different types of coffee from an online store
- If you buy it in person, you will have the choice to see and smell the coffee beans if you buy from a physical store
2. Buy a small amount or a sample pack of green coffee for experimenting
It might take time before you finally perfect your coffee roasting, so it is advisable to buy smaller amounts initially and experiment with it.
3. Remember to buy decaf green coffee beans if you prefer decaf coffee
If you would like to have some decaf coffee, buy them from the store; they are not made during the roasting process. There are green decaf coffee beans in stores.
4. Purchase large batches of green coffee beans when you have perfected your technique
Once you have perfected your coffee-making process, you can start buying coffee beans in larger quantities.
The Takeaway
I have listed above the steps involved in roasting your coffee at home, and the procedures are very easy to carry out. Roasting your own coffee beans at home will save you the cost of buying roasted ones in stores, and it’s a fun project if you are a coffee lover. Happy sipping!
If you have any comments, please leave them below, I’d love to hear from you. If you’re a coffee lover and a dog lover check these pet supplements.
Roasting coffee beans is a very delicate process. It requires constant temperature check, and a lot of attention to make sure the coffee beans are well/perfectly roasted. I always saw roasting coffee beans as something that can only be done industrial, I never knew it could be done so easily at home. Now that I know, I will make out time to try this guide some day.
Reply
Thank you for your comment. Interestingly enough most people did not know that coffee roasting can be done at home.
Michael
Reply
Hey there, thank you for sharing this masterpiece of information, it was educating and shocking as well, I never knew this was possible from the comfort of my home, it was really an eye opener, I just showed this to my wife and we agreed that we’ll definitely do this together in the near future. It was really wonderful to know that you can roast coffee beans at the comfort of your home
Reply
Thank you for your thoughts. Its interesting to know that most people has no idea that you can roast coffee beans at home rather as easy as popcorn. Thanks
Michael
Reply
I was laughing myself as I continued to read your article. Truly speaking I have never asked myself how is coffee is made. However I have always complained about the price of coffee. I am glad I found your article, It was really eye opening. Now I know that if I continue to cry about the price of coffee, It is really by choice .
Reply
Excellent comment! I try to be informative and educational. Thanks
Michael
Reply
Hello there, thank you so much for sharing this. this is a very awesome piece and a very detailed one. I’m really happy I came across this. Never for once thought if it’s possible to roast coffee in the oven but thanks to this article, I learnt everything about it and also how the roasted coffee can be very nutritious
Reply
Cherie, thank you for your comments. Most people did not know you can roast your own coffee beans, and that is why I detailed the process. Remember the sooner you grind the coffee after its been roasted, the better flavor, and aroma you get out of it.
Michael
Reply
I absolutely love coffee so understanding how the roasting process works is very interesting. I always have filter coffee, never instant so do have an appreciation for the process. My favourite Coffee is called Java, it’s a dark roast which I have every morning – gets the day off to a great start. thanks for the info
Reply
Dan, thank you for your comments, and glad you found the article interesting
Michael
Reply